Refreshing existing kitchen worktops with vinyl wrap can be an affordable, DIY-friendly solution that avoids the upheaval and expense associated with a complete replacement while simultaneously decreasing your carbon footprint by keeping an old worktop out of landfills.
Step one is to begin gradually smoothing out one corner, working out any air bubbles as you go. A hair dryer may help soften thick vinyl if necessary.
Choose the right material.
Rather than undertaking a costly kitchen renovation project, vinyl worktop wraps could be the ideal solution to revive their appearance without disrupting daily routines. These self-adhesive coverings resemble granite, marble, or wood countertops and can be installed quickly in an afternoon, offering a cost-effective alternative that adds colour and texture to your home!
There are various wrap companies offering kitchen worktop wraps in various designs, styles, and materials, making the decision process more arduous than necessary. It’s best to take your time when browsing options before making your choice; be sure to order lots of samples so you can see how the wrap looks against your space as well as compare colours and textures before making an official selection.
Marble is a versatile material, fitting perfectly into many kitchen schemes. This durable material can easily be cleaned off after meals and resists heat damage. For something with a more contemporary appeal, glass is another wonderful choice, pairing well with other materials and being easily formed into unique shapes.
Quartz is a man-made composite material with the appearance of natural stone combined with increased durability. It’s extremely tough and scratch-resistant, coming in an assortment of finishes and colours to meet any decor need. Furthermore, its versatility means you can have custom cutouts designed specifically for sinks, hobs, or taps to add some unique design elements.
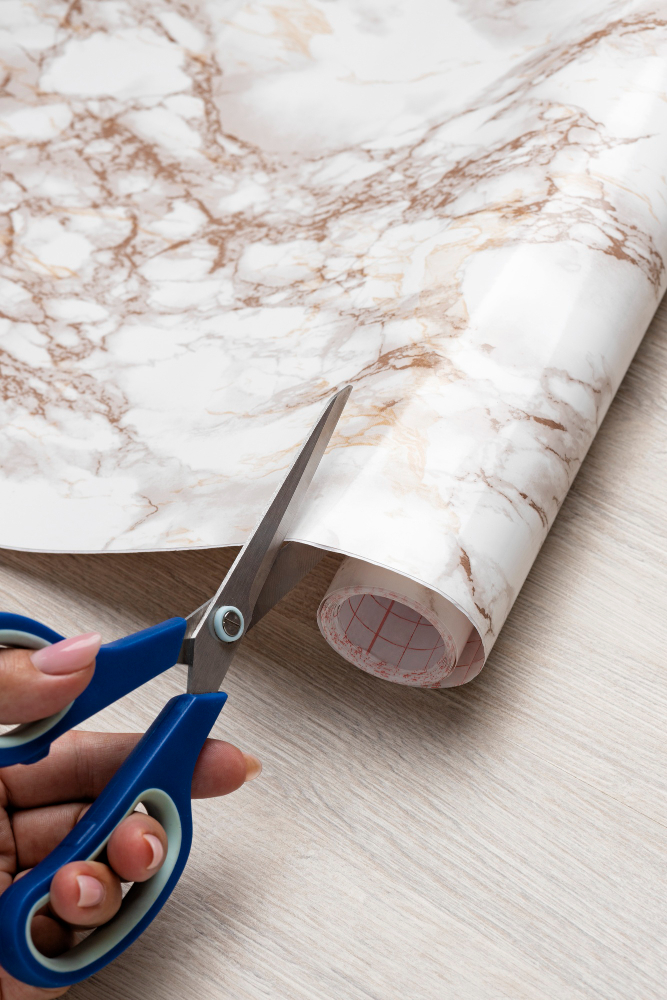
Once you’ve selected the material that best meets your needs, it’s time to measure up. Take careful note when measuring both ends and kickboards separately as well. Allow an extra 15cm (6 inches) for overlap on both ends of your worktop before beginning this task.
For a sleek finish, it is crucial to properly clean the surface and remove any silicone sealants near sinks, hobs, or hot water taps. In addition, once a year, oil your worktop, as this will protect it against further damage.
Measure & mark.
Kitchen worktop wraps are self-adhesive vinyl sheets designed to improve the appearance of an existing worktop for much less cost and time than a replacement. Perfect if your worktop has scratches and chips but cannot afford a complete replacement—creating an entirely new look can be done for under £50 in just hours of effort!
Start by cleaning and prepping the counter surface; this will ensure the film sticks well to it and can help save money on future repairs. Remove any silicone from around your sink or hob, if applicable, as well as any excess glue from any glue gun applications. Next, sketch out an approximate plan of the area; there is no need for scale here, as this will help when communicating your design to a fabricator later on.
Make use of your sketch measurements to decide on an adequate length for your roll of wrap. Allow enough length to wrap the entire surface, plus extra for wrapping around front edges or overhangs, and allow space on both sides for cutting off any excess length.
Once you’ve purchased your roll, begin peeling back the backing paper at one end slowly until you’re ready to apply the vinyl. Press firmly against each section as you go along, using your squeegee to smooth any bubbles as you go. Be wary of rushing or you risk having adhesive vinyl adhering itself to itself or walls and leading to large air pockets, which are difficult to work out later.
Use a hairdryer on the edges of vinyl to soften it and make it more flexible around hard-to-reach areas such as your sink or hot water taps. Once you’ve covered all areas, inspect any small bubbles using a pin before squeegeeing and smoothing them out using your squeegee or smoother. After this is completed, let it set for 24 hours to cure and seal itself before curing any sealants that have formed under its surface.
Clean the surface.
Kitchen worktops are one of the most-used surfaces in any home and, over time, can become stained and dull. Luckily, it is an inexpensive and straightforward task to revive them with a worktop wrap—there’s bound to be one available that fits seamlessly. Whether your countertops are quartz, granite, or wooden, there will always be one available!
Before applying vinyl, ensure your worktop is thoroughly clean and dry. Scrub the surface to remove any silicone sealant around sinks, hot water taps, and hobs, as this will ensure proper adhesion between vinyl and your countertop.
Clean your worktops using hot soapy water and a cloth or sponge, though certain materials require additional special care. Granite is particularly porous and absorbent; therefore, it should be rinsed and wiped regularly after being in contact with acidic substances such as lemon juice. Quartz and Okite (r) require less frequent rinsing but still should be thoroughly rinsed after contact to maintain optimal condition.
Wooden worktops are particularly easy to keep clean. A natural oil such as Danish oil can restore them to their former glory; this should be done at least annually so as to maintain the moisture levels in the wood and help avoid cracking and warping.
Hygienic considerations dictate keeping worktops dust-free; for this reason, it’s wise to clear and sweep your work area regularly, as well as the walls. Furthermore, the use of abrasive cleaners like steel wool scourers should be avoided, as this may leave scratches behind on your worktops and lead to permanent marks being left on them.
Once you’re ready to apply vinyl, the best approach is to work in small sections. This will allow you to avoid unsightly seams while making the process simpler. Start at one end and work your way across, smoothing with a plastic smoother as you go. When complete, trim to size to make sure it lays flush against all edges; any mistakes made during application can easily be pulled back off and reapplied without much hassle.
Apply the vinyl.
Vinyl wrap could be the solution if you want to upgrade your kitchen without making permanent worktop changes and without breaking the bank in the process. Available in various colours and patterns that replicate granite, marble, and wood-inspired surfaces, as well as being hardwearing enough to last up to 10 years with proper sealing, but before embarking on this venture, there are a few key considerations you must keep in mind before getting started.
Before beginning, clear and scrub your counters clean. Next, carefully measure your worktops to ascertain how much wrap will be necessary; purchasing one that’s longer than your counter should help avoid seams. Once you know how much wrap to purchase, it’s time to begin applying it, starting from one corner and gradually smoothing it across each worktop using credit cards’ flat edges to help eliminate air bubbles if any arise. Take your time when doing so, as rushing can result in mistakes and uneven coverage.
Once your vinyl worktops have reached their ideal finish, use a sealant to shield them from liquid and food spills and ensure their longevity. Apply this layer especially around sinks, hot water taps, and hobs, as vinyl can easily melt under direct heat sources and scorch away!
Kitchen worktop wraps offer an effective way to update old countertops, but for maximum impact, it is best to seek professional assistance in getting it done. They will possess all of the tools and expertise required to fit and protect the worktops properly while giving your counters an elegant new look that’s sure to impress any guests, plus saving the environment by diverting old worktops away from landfill sites!
Quick Guide to Wrapping Kitchen Worktops
If you are in need to wrap your worktops fast, here is a quick guide to wrapping your kitchen countertops fast and efficiently.
- Choose the Right Material: Select a suitable wrapping material. Vinyl wrap is a popular choice due to its durability and variety of designs.
- Clean the Worktop: Thoroughly clean the worktop to remove any dirt, grease, or debris. This ensures the wrap adheres properly.
- Measure and Cut the Wrap: Measure your worktop and cut the wrap to size. It’s advisable to leave a little extra material on each edge for precision trimming later.
- Apply the Wrap: Peel back a section of the protective backing and carefully align the wrap with the edge of the worktop. Slowly stick the wrap down, smoothing out any air bubbles as you go. A soft cloth or a squeegee can be helpful for this.
- Trim and Finish: Once the wrap is fully applied, use a sharp knife to trim any excess material. Be careful to cut cleanly along the edges of the worktop.
- Heat and Seal: Some wraps require a bit of heat to fully adhere. Use a hair dryer or a heat gun (on a low setting) to gently heat the wrap. This helps it to mold to the worktop and ensures a tight seal.
- Inspect and Adjust: Finally, inspect your work. Make any necessary adjustments to ensure the wrap is smooth and fully adhered to the worktop surface.